This article describes all the steps needed to enable HTTPS (SSL) communications for Maximo.
It comprises the following main steps.
- Creation of a self-signed certificate
- IBM HTTP Server configuration
- WebSphere configuration
- Adjust DocLinks settings
Create a self-signed certificate
Run IBM Key Management utility - Start > Programs > IBM HTTP Server > Start Key Management Utility.
Click Create a new key database file button.
Leave default values and click OK. Take note of the key.kdb file path.
Enter a password and select Stash password to a file option. Click OK.
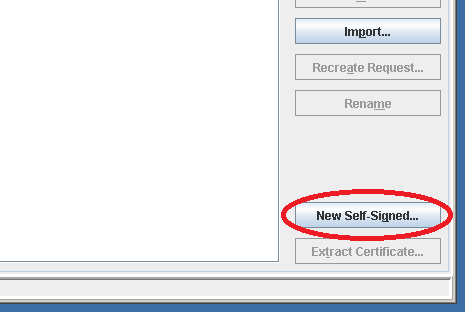
Click New Self-Signed... button.
Enter MX_SSL_KEY for Key Label and leave default for other fields. Click OK to create a self-signed certificate.
Select Key Database File > Stash Password and close IBM Key Management utility.
Web server configuration
Backup C:\Program Files\IBM\HTTPServer\conf\httpd.conf file and open it with text editor.
If you want to disable HTTP you have to remove or comment out the following line.
Listen 0.0.0.0:80
To enable HTTPS on the default port 443 paste the following rows.
LoadModule ibm_ssl_module modules/mod_ibm_ssl.so
Listen 0.0.0.0:443
<VirtualHost *:443>
 SSLEnable
</VirtualHost>
KeyFile "C:\IBM\HTTPServer\key.kdb"
SSLDisable
Verify the path of the key.kdb file matches with the one you have generated before.
Restart IBM HTTP Server by following sequence.
- Stop Admin Server
- Stop HTTP Server
- Start Admin Server
- Start HTTP Server
WebSphere configuration
Login to WebSphere ISC console and navigate down to Environment > Virtual Hosts > maximo_host > Host Aliases.
Verify that port 443 is present. Add it if missing. You may also wish to remove port 80 and other unused ports.
Navigate to Servers > Server Types > Web servers. Select webserver1 and click Generate Plug-in. Select webserver1 again and click Propagate Plug-in.
Continue from ISC console, restart MXServer in Servers > Server Types > WebSphere application servers.
Verify the connection by logging in at https://[MXHOST]/maximo, where [MXHOST] is the host name of the HTTP server. Now your server is running in SSL.
Adjust DocLinks settings
The last step is to change the URL generated by Maximo to display attachments.
Login as maxadmin and modify the mxe.doclink.path01 System Property to replace http:// with https://
Do a Live Refresh of this property and test by downloading an attachment.
References
Enabling SSL in IBM SmartCloud Control Desk
Guide to properly setting up SSL within the IBM HTTP Server
Source:http://maximodev.blogspot.com/2014/05/securing-maximo-ssl-https.html


Hi, I would like to enable both HTTP and HTTPS for Maximo. How could I do that?
BalasHapus